
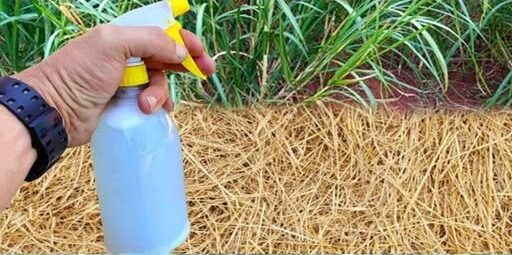
Simple Homemade Weed Killer for Driveways, Sidewalks, and Patio Cracks
A Practical Way to Manage Unwanted Weeds
Weeds are among the most persistent problems faced by homeowners and gardeners. They can appear rapidly in places that looked clear only a short time earlier, often returning even after they have been pulled by hand.
Unwanted plants frequently grow in flower beds, vegetable gardens, lawns, gravel paths, driveways, sidewalk edges, and the narrow gaps between patio stones. Their ability to establish themselves in small cracks can make outdoor areas look neglected and difficult to maintain.
Commercial weed-control products are widely available, but some homeowners prefer not to use strong herbicide chemicals near children, pets, garden plants, or beneficial insects. This has encouraged greater interest in simple homemade mixtures prepared with familiar household ingredients.
One commonly used option combines water, salt, baking soda, and liquid dish soap. When applied directly to unwanted weeds under suitable conditions, the mixture may help dry the foliage and weaken the plant.
This homemade solution is most appropriate for hard surfaces and locations where no desirable plants are intended to grow. Careful use is essential because the mixture is non-selective and may harm flowers, vegetables, grass, shrubs, and young trees.
Why Homemade Weed-Control Mixtures Are Popular
Cost is one reason many people try homemade weed killers. The ingredients are inexpensive, and most of them are already found in ordinary kitchens or cleaning cupboards.
The mixture is also easy to prepare. It does not require specialized gardening equipment, complicated measurements, or a lengthy preparation process.
Another advantage is convenience. A small batch can be mixed when needed and transferred into a standard spray bottle for targeted treatment.
Homemade weed-control solutions are particularly useful in cracks along driveways, sidewalks, gravel paths, and patio joints. These are areas where weeds may be difficult to pull completely because their roots are hidden beneath hard surfaces.
Some people also choose homemade mixtures because they want to avoid many of the ingredients found in commercial herbicides. However, homemade does not automatically mean harmless.
Salt, baking soda, and soap can all affect plants and soil. Improper or excessive use may damage nearby vegetation and make it difficult for new plants to grow in the treated area.
Ingredients for a 500-Milliliter Batch
Preparing approximately 500 milliliters of homemade weed killer requires only four ingredients. Accurate proportions help keep the mixture consistent from one batch to another.
Begin with 500 milliliters of water. The water serves as the base that allows the remaining ingredients to be combined and sprayed evenly.
Add one tablespoon of salt. Salt contributes to the drying effect of the mixture by drawing moisture from plant tissue.
Include one tablespoon of baking soda. Baking soda may change conditions on the surface of the leaves and make it harder for some weeds to remain healthy.
Finally, add five tablespoons of liquid dish soap. The soap helps the solution spread across the foliage and remain in contact with the leaves and stems.
A larger batch can be prepared by multiplying all four ingredients while preserving the same proportions. Changing only one ingredient may make the mixture unnecessarily strong or reduce its effectiveness.
Step One: Combine the Ingredients
Pour the measured water into a large, clean container. Choose a container with enough extra space to stir the solution without causing it to spill.
Add the tablespoon of salt to the water. Stir briefly to begin distributing the salt throughout the liquid.
Next, add one tablespoon of baking soda. Continue stirring so that the powder does not remain concentrated in one part of the container.
Add the five tablespoons of liquid dish soap last. Pouring slowly can help prevent excessive foam from forming while the ingredients are being combined.
Stir the mixture thoroughly until it appears uniform. The salt and baking soda should be distributed as evenly as possible before the solution is placed in a spray bottle.
Some settling may still occur after the mixture stands for a period of time. This is normal and is one reason the bottle should be shaken before every application.
Step Two: Fill a Spray Bottle
Once the mixture has been combined, transfer it into a clean spray bottle. A bottle with an adjustable nozzle makes it easier to control where the solution lands.
Using a funnel can reduce spills and prevent the mixture from running down the outside of the bottle. Pour slowly, especially if foam has formed near the top of the container.
Do not fill the spray bottle completely to the rim. Leaving a small amount of empty space allows the ingredients to move when the bottle is shaken.
Salt may gradually settle at the bottom during storage. Shake the bottle thoroughly before every use so the mixture is evenly distributed.
Check that the nozzle sprays correctly before approaching desirable plants. Testing it over a safe hard surface can prevent an unexpected stream from landing on flowers, grass, or vegetables.
Step Three: Spray the Weeds Directly
Apply the mixture directly to the visible leaves and stems of the unwanted weed. The goal is to coat the plant rather than soak the entire surrounding area.
Spray carefully until the foliage is covered. The liquid dish soap helps the solution cling to the leaves instead of immediately sliding off.
A targeted application reduces the amount of salt entering nearby soil. It also lowers the risk of accidentally damaging plants that should remain healthy.
Do not spray broadly across a flower bed, vegetable garden, or lawn. The mixture cannot distinguish between a weed and a desirable plant.
For weeds growing near garden plants, consider shielding the desired vegetation while spraying. Even a small amount of drifting solution may cause leaf damage.
Choosing the Best Weather for Application
Weather conditions can influence how the homemade weed killer performs. A dry, warm day generally provides the most suitable opportunity for application.
Avoid spraying shortly before rain. Rainfall may wash the mixture from the leaves before it has had enough time to remain in contact with the plant.
Warm or hot weather can support the drying process. Weeds already exposed to heat and sunlight may show stress more quickly after treatment.
Windy conditions should also be avoided. Wind can carry fine droplets onto grass, flowers, shrubs, vegetable plants, or other nearby vegetation.
After spraying, allow several hours before watering the surrounding area. Giving the solution time to remain on the foliage may improve the visible effect.
If the weather changes unexpectedly and heavy rain begins soon after treatment, the application may be less effective. Another careful treatment may be needed after the area dries.
How Salt Affects Unwanted Plants
Salt is one of the main active ingredients in this homemade mixture. It can draw moisture from plant tissue and contribute to dehydration.
As moisture is lost, leaves may begin to wilt, curl, change color, and dry. The severity of the reaction depends on the type of weed, the amount applied, and the weather conditions.
Salt can also remain in soil. This makes it useful in areas where plant growth is not wanted, but it creates a risk in gardens and lawns.
Repeated heavy applications may cause salt to accumulate. Over time, this can interfere with the ability of desirable plants to grow in the same location.
For this reason, the mixture should not be poured directly onto large areas of soil. Spraying only the weed’s visible foliage is a more controlled approach.
The Role of Baking Soda
Baking soda may alter conditions on the surface of plant leaves. This can make survival more difficult for some weeds, particularly when the foliage is thoroughly coated.
Its effect may vary depending on the plant. Some weeds are more resistant than others and may require more than one carefully timed application.
Like salt, baking soda should be used cautiously around desirable vegetation. Direct contact may cause visible damage to leaves and stems.
Applying more baking soda than the recipe requires does not guarantee better results. Maintaining the stated proportions provides a more predictable mixture.
Why Dish Soap Is Included
Liquid dish soap helps the homemade herbicide remain on the plant. Many leaves have a waxy outer coating that causes plain water to form droplets and roll away.
The soap helps break down that surface resistance. It allows the water, salt, and baking soda mixture to spread more evenly across the foliage.
Improved contact gives the other ingredients more time to affect the leaves. This is why the solution should coat the plant rather than be sprayed lightly from a distance.
Dish soap itself can also affect leaf tissue. Because of this, the mixture should never be sprayed on plants that the homeowner intends to protect.
Visible Changes After Treatment
Some weeds may begin showing signs of stress within several hours. The exact timing depends on temperature, sunlight, weed type, plant size, and the amount of solution that reaches the foliage.
Wilting is often one of the earliest visible changes. Leaves may lose their firmness and begin bending downward.
Leaf curling may also occur as the plant loses moisture. The edges may turn inward or appear dry and uneven.
Color changes can develop as the foliage becomes stressed. Healthy green leaves may begin looking pale, yellow, brown, or faded.
Drying may continue during the following days. Under favorable conditions, the visible portion of the weed may eventually become completely brown.
Larger or well-established weeds may not die after a single treatment. Deep roots can sometimes remain alive even after the top growth appears damaged.
Important Safety Precautions
This homemade solution is non-selective. It can injure nearly any plant it touches, not only the weeds being targeted.
Avoid spraying flowers, vegetable plants, grass lawns, shrubs, and young trees. Overspray may leave damaged patches or cause leaves to dry and discolor.
Extra caution is necessary near food-growing areas. The solution should be directed only at unwanted plants and kept away from vegetables and herbs.
Do not assume that natural household ingredients are automatically safe for every garden location. Concentrated salt and soap can have strong effects on living plants.
Repeated use in the same soil may make the area less suitable for future planting. Consider whether flowers, grass, or vegetables may be added to the location later.
Keeping the spray close to the weed and using a controlled nozzle can reduce drift. Applying the mixture on a calm day provides additional protection for nearby plants.
Where the Mixture Works Best
Driveway cracks are among the most appropriate places to use this homemade weed killer. These spaces often contain persistent weeds, and desirable plants are rarely intended to grow there.
Sidewalk edges and pavement joints are also suitable treatment areas. The spray can be directed into narrow gaps where pulling weeds by hand may be difficult.
Gravel paths frequently develop scattered weeds between stones. Targeted spraying may help reduce visible growth without treating the entire path.
Patio joints can also benefit from careful application. Weeds growing between stones or paving blocks can make the surface appear untidy and may be difficult to remove completely.
The solution is most useful in areas where no future plant growth is desired. It should be used much more cautiously in garden soil, lawns, and landscaped spaces.
Setting Realistic Expectations
A homemade herbicide may not produce identical results on every type of weed. Young, tender plants may respond more quickly than mature weeds with thick stems or deep root systems.
Weather conditions also affect performance. A warm, sunny day may produce faster drying than a cool or cloudy period.
Some weeds may require a second targeted application. Before spraying again, observe the plant for several days and evaluate whether the foliage is continuing to dry.
Removing dead growth after treatment can improve the appearance of the area. However, roots may remain beneath the surface and produce new shoots later.
Regular inspection of driveways, paths, and patio joints can make weed control easier. Small weeds are often simpler to treat than plants that have been allowed to grow for several weeks.
Final Considerations
This homemade weed killer provides an affordable and simple option for managing unwanted plants in selected outdoor areas. Its four ingredients are easy to obtain and can be mixed in only a few minutes.
The solution is best reserved for driveway cracks, sidewalk edges, gravel paths, patio joints, and other places where no plants are wanted. These locations reduce the risk of harming valuable garden vegetation.
Careful application is more important than heavy application. Coating the weed’s leaves and stems directly can help limit the amount of salt entering the surrounding soil.
Although the mixture may not replace every commercial weed-control method, it can be a useful addition to routine outdoor maintenance. It offers a practical way to treat isolated weeds without purchasing a specialized product.
Using the correct proportions, choosing dry and calm weather, shaking the bottle before use, and protecting nearby plants will support better results.
Responsible use is essential because natural ingredients can still damage soil and vegetation. With realistic expectations and precise application, this homemade herbicide may help keep hard surfaces and pathways looking cleaner and better maintained.