
How to Remove Stubborn Black Mold From Shower Silicone Without Endless Scrubbing
Why Mold Commonly Appears Around Shower Silicone
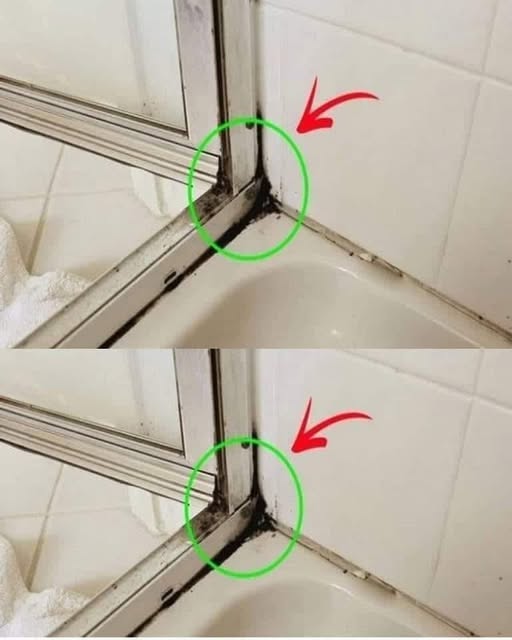
Black mold stains around shower silicone can make an otherwise clean bathroom look neglected. These dark marks often develop along the edges of the tub, around shower doors, and in corners where water remains after bathing.
Silicone sealant is used to prevent water from entering gaps between bathroom surfaces. Although it creates a protective barrier, its location makes it especially vulnerable to constant moisture, soap residue, and poor airflow.
When the shower does not dry completely, damp conditions can remain around the silicone for hours. Over time, small dark spots may appear and gradually spread along the sealant.
Ordinary wiping is often not enough to remove these stains. Mold can cling tightly to the surface, while aggressive scrubbing may damage or loosen the silicone.
A simple homemade cleaning mixture can help soften the buildup before the area is brushed. Allowing the solution time to work is the key to reducing the amount of physical scrubbing required.
Three Simple Ingredients for the Cleaning Mixture
The homemade solution uses warm water, white wine vinegar, and baking soda. These common household ingredients can be combined to create a practical cleaner for stained shower silicone.
Use one-quarter warm water and three-quarters white wine vinegar. Add two tablespoons of baking soda to complete the mixture.
The warm water helps distribute the ingredients and makes the solution easier to apply. The vinegar provides the main cleaning action against the dark residue surrounding the silicone.
Baking soda adds a mild abrasive quality that can assist when the softened stains are brushed later. Because it reacts when combined with vinegar, the ingredients should be mixed carefully in a container with enough empty space.
Pour the prepared solution into a suitable bottle. Do not fill the bottle completely, as the mixture may foam when the baking soda is added.
Close the bottle only after the initial bubbling has settled, and shake it gently to combine the ingredients. Excessive shaking immediately after mixing may create unnecessary pressure inside the container.
Prepare the Shower Before Applying the Cleaner
Before treating the mold, remove shampoo bottles, soap containers, razors, and other items from the area. This gives you clear access to the affected silicone and prevents the cleaning mixture from coating personal products.
Wipe away loose water, hair, and surface residue. The silicone does not need to be perfectly dry, but removing standing water prevents the cleaner from becoming excessively diluted.
Inspect the entire seal rather than focusing only on the darkest stain. Small spots may be developing in nearby corners or underneath the edge of the shower door.
Treating the full affected section can help create a more even appearance. It may also prevent overlooked patches from becoming more noticeable later.
Open a window or use the bathroom ventilation system while cleaning. Good airflow helps the area dry more effectively once the treatment is complete.
Apply the Solution Directly to the Dark Stains
Pour or spray the homemade cleaner directly onto the mold-stained silicone. The affected area should be thoroughly coated so the mixture remains in contact with the discoloration.
Pay particular attention to corners and joints. These locations often collect the most moisture and may require a more generous application.
A narrow applicator or spray nozzle can make it easier to follow the silicone line without covering the entire shower wall. The goal is to saturate the stained sealant rather than waste the mixture on unaffected surfaces.
Once the cleaner has been applied, leave the area undisturbed for approximately 30 minutes. Avoid rinsing or wiping it away during this period.
The resting time allows the solution to loosen the buildup. Trying to scrub immediately may require more effort and may not provide the same result.
Why the 30-Minute Waiting Period Matters
Many people begin scrubbing as soon as a cleaning product touches the stain. With stubborn shower mold, patience can be more effective than force.
Silicone is flexible and can be damaged by rough tools or excessive pressure. Allowing the cleaner to sit reduces the need for harsh scraping.
During the 30-minute treatment period, the liquid remains against the mold marks and begins softening the surface residue. This makes the next step easier and more controlled.
Do not allow the area to become completely dry before brushing. If the cleaner evaporates quickly, apply a small additional amount to keep the silicone damp.
Warm, poorly ventilated bathrooms may hold moisture longer, while a well-ventilated room may cause the mixture to dry faster. Check the area occasionally without disturbing it unnecessarily.
Use a Toothbrush for Controlled Scrubbing
After the solution has remained on the silicone for 30 minutes, use a toothbrush to scrub the stained sections gently.
A toothbrush is useful because its small head can reach narrow joints, corners, and the edges between silicone and tile. Its bristles also provide more control than a large cleaning brush.
Move the toothbrush along the silicone line using short strokes. Focus on the darkest areas, but avoid pressing so forcefully that the sealant begins to lift.
If the stain is located in a corner, change the angle of the brush so the bristles reach both adjoining surfaces. Mold residue often collects in the crease rather than on the exposed surface alone.
Continue brushing until the loosened discoloration begins to lift. The solution may become darker as residue mixes with the liquid.
For wider silicone lines, work in small sections. This makes it easier to ensure every part receives enough attention.
Rinse the Area Thoroughly With Warm Water
Once the silicone has been brushed, rinse it thoroughly with warm water. All remaining cleaner, baking soda residue, and loosened material should be removed.
Use a clean cloth or the shower spray to direct water along the treated seal. Continue rinsing until the surface no longer feels gritty.
Pay attention to the bottom edges of the shower, where the used solution may collect. Leaving residue in these areas can create a dull appearance after drying.
After rinsing, inspect the silicone while it is still wet. Some stains may appear lighter immediately, while the full result may become more visible once the seal is dry.
If a dark patch remains, avoid immediately attacking it with a sharp object or abrasive tool. Repeating the gentle treatment is safer than damaging the waterproof seal.
Drying Is an Essential Final Step
Use a clean, dry cloth to wipe the silicone and surrounding surfaces after rinsing. Removing the remaining moisture is important because persistent dampness is one of the main reasons mold returns.
Run the cloth along the entire silicone line, including corners and lower edges. These small spaces can hold drops of water even when the rest of the shower appears dry.
Leave the shower door or curtain open after cleaning so air can circulate. Continue running the ventilation system if the bathroom remains humid.
The silicone should be allowed to dry completely before the shower is used again. A dry environment helps preserve the cleaner appearance achieved through the treatment.
How to Reduce Future Mold Buildup
Removing existing stains is only part of the solution. Preventing moisture from remaining around the silicone can greatly reduce how quickly the dark marks return.
After each shower, rinse away visible soap residue and wipe excess water from the walls, doors, and silicone. A small squeegee can make this task faster.
Finish by running a dry cloth along the sealed edges. This takes only a short time but removes the water that tends to collect in corners.
Keep the shower curtain extended rather than leaving it folded while wet. If the bathroom has a door, leave it partially open so trapped moisture can escape.
Use the ventilation fan during bathing and continue using it afterward. Where possible, opening a window can provide additional airflow.
A regular cleaning schedule also prevents soap film and grime from accumulating. Mold is easier to manage when the area is cleaned before heavy staining develops.
Check the Condition of the Silicone
Cleaning can improve mold staining on the surface, but old silicone should also be inspected for physical damage.
Look for cracks, gaps, peeling edges, or sections that have separated from the tile or shower base. Damaged sealant may allow water to collect behind it.
If the black discoloration appears deeply embedded beneath the silicone rather than on its surface, ordinary cleaning may not restore its original appearance.
A seal that is loose or badly deteriorated may need to be removed and replaced. Continuing to scrub damaged silicone will not repair its waterproof function.
Regular inspection helps identify these problems before moisture moves into surrounding materials. The silicone should remain firmly attached and form an unbroken seal.
A Simple Routine for a Cleaner Shower
Stubborn black mold around shower silicone can be difficult to remove through scrubbing alone. A homemade mixture of warm water, white wine vinegar, and baking soda provides a straightforward way to loosen the stains first.
Combine one-quarter warm water with three-quarters white wine vinegar and two tablespoons of baking soda. Apply the mixture directly to the stained silicone and allow it to remain for 30 minutes.
Brush the area gently with a toothbrush, rinse thoroughly with warm water, and dry everything with a clean cloth.
The cleaning process is simple, but prevention determines how long the results last. Keeping the shower clean, ventilated, and completely dry after each use makes the environment less favorable for new buildup.
With consistent care, the silicone can remain brighter and cleaner without requiring constant aggressive scrubbing. A few minutes of drying after each shower may prevent a much larger cleaning job later.