
Slow Cooker Easter Candy Brings an Easy, Festive Touch to Holiday Dessert Tables
Slow Cooker Easter Candy offers a simple way to create a rich holiday sweet without the pressure of complicated candy-making techniques. Built around white chocolate chips, milk chocolate chips, peanut butter, sweetened condensed milk, and vanilla extract, this recipe transforms a handful of familiar ingredients into a smooth, dense treat with a soft fudge-like texture.
The appeal of this candy lies in how little active work it requires. Instead of standing over a stove and worrying about temperature changes, the mixture melts slowly and evenly in the cooker, allowing the ingredients to come together with minimal stress.
Its pastel topping gives it a seasonal finish that suits Easter gatherings, spring dessert trays, and homemade gift boxes. Once chilled and cut into pieces, it becomes a colorful, easy-to-serve candy that can sit neatly alongside other holiday sweets.
A Holiday Candy Designed for Convenience
This recipe is built for cooks who want a festive dessert that feels special without becoming time-consuming. The slow cooker handles most of the work, gently heating the chocolate, peanut butter, and condensed milk until the mixture becomes smooth and glossy.
That gradual melting process is one of the recipe’s biggest strengths. Rather than rushing the ingredients over direct heat, the candy develops in a controlled environment that helps maintain a creamy texture.
Because the mixture is thick and rich, the finished candy holds its shape well once set. That makes it practical for serving at room temperature, arranging on a platter, or packaging for later enjoyment.
The Ingredient List Keeps Things Straightforward
The recipe uses 12 ounces of white chocolate chips and 8 ounces of milk chocolate chips as the main chocolate base. This blend creates a balanced sweetness while giving the finished candy a fuller texture than white chocolate alone.
One cup of peanut butter adds creaminess and structure. Either creamy or chunky peanut butter can be used, depending on whether a smoother or slightly textured finish is preferred.
A 14-ounce can of sweetened condensed milk brings the mixture together and contributes to the dense, velvety consistency that defines the candy. It also helps the melted ingredients combine into a uniform base that spreads easily into the pan.
One teaspoon of vanilla extract is added after the melting stage to round out the flavor. While it is a small amount, it helps complete the overall taste and gives the candy a more finished dessert profile.
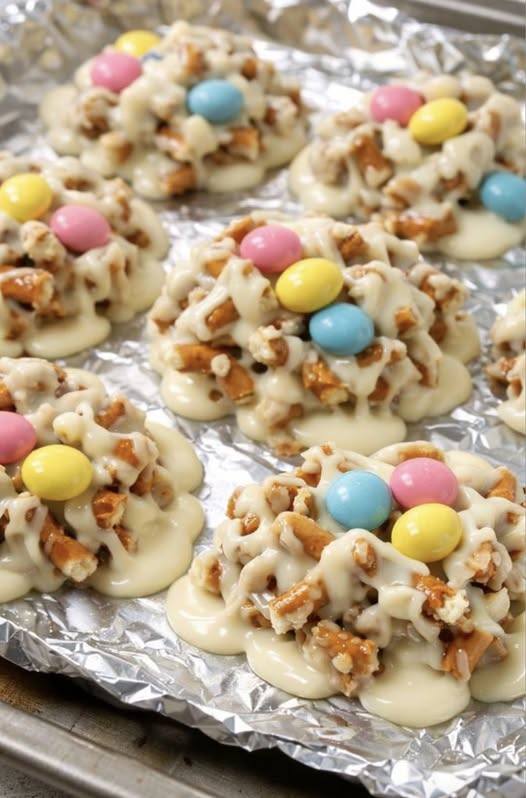
The final decorative element is 1 cup of pastel candy-coated eggs. These are pressed onto the surface before chilling, giving the candy a distinctly Easter-themed appearance.
Optional toppings such as sprinkles, nuts, or coconut can also be added. These extras are not required, but they allow the top layer to take on a different texture or visual style while staying within the same simple method.
Why the Slow Cooker Method Works So Well
Chocolate can be delicate when melted, especially in recipes that rely on a smooth finish. The slow cooker helps solve that problem by providing low, steady heat instead of intense direct contact from a stovetop burner.
This gentler heating method reduces the risk of the chocolate seizing. It also makes the process more forgiving, which is especially helpful for home cooks preparing multiple dishes for a holiday celebration.
Since the recipe is meant to be a “set-it-and-forget-it” style dessert, the slow cooker fits naturally into the process. Even so, the candy still needs occasional stirring to stay smooth and prevent trouble at the edges.
The result is a candy mixture that looks polished and feels consistent, without requiring advanced technique. That ease is a major part of what makes the recipe attractive for seasonal baking and candy preparation.
Preparing the Slow Cooker Properly Matters
The first step is to lightly grease a 4- to 6-quart slow cooker with non-stick spray or line it with parchment paper. This preparation helps prevent sticking and makes cleanup much easier after the mixture has been transferred out.
Using parchment paper is especially practical. It creates a simple barrier between the pot and the chocolate mixture, and it can help lift out any residue that might otherwise cling to the sides.
That small step saves time at the end of the process and keeps the focus on the finished candy rather than on scrubbing the cooker. For a recipe designed to reduce effort, this preparation supports the same goal from the beginning.
Melting the Base in Stages
Once the cooker is prepared, the white chocolate chips, milk chocolate chips, peanut butter, and sweetened condensed milk are added together. These ingredients form the entire base of the candy and begin transforming as they warm.
The mixture is cooked on LOW for 90 to 120 minutes. That time range allows enough flexibility for the ingredients to melt fully without rushing the process.
As the mixture heats, the chocolate softens first, followed by the peanut butter and condensed milk blending into it. Over time, everything turns into a thick, glossy mass that can be stirred into a unified consistency.
The appearance of the mixture is an important indicator. Once it looks smooth and evenly combined, it is ready for the next step.
Stirring Is Essential During Cooking
Although this recipe is easy, it still depends on one key habit during the melting stage: stirring every 20 to 30 minutes. This prevents the edges from overheating and keeps the texture even throughout the pot.
Because white chocolate and sweetened condensed milk both contain a high amount of sugar, the outer portions of the mixture can scorch if left untouched for the full cooking time. Regular stirring keeps the blend moving and helps protect the smooth finish.
This step is not difficult, but it is important. A few quick stirs during the 90- to 120-minute melting window help maintain the creamy structure that gives the candy its professional appearance.
That balance of low effort and light supervision is part of the recipe’s strength. It remains convenient without sacrificing the quality of the final result.
Adding Flavor and Shaping the Candy
After the mixture is fully melted and glossy, the vanilla extract is stirred in. This happens at the end of the heating stage, once the main ingredients have already formed a cohesive base.
An 8-by-8-inch baking pan should be lined with parchment paper before the candy is poured in. This makes it easier to remove the chilled slab later for slicing.
The warm mixture is then transferred into the lined pan and smoothed across the surface with a spatula. Because the candy is thick, spreading it evenly helps create uniform pieces once it has firmed up.
At this point, the candy already has the look of a finished holiday dessert base. All that remains is the topping and the chilling time needed to set it completely.
Decorating for an Easter Finish
The pastel candy-coated eggs are sprinkled over the top while the candy is still warm. Pressing them down gently helps anchor them into the surface so they stay in place once the candy firms up.
This topping gives the recipe its Easter identity right away. The soft colors stand out against the creamy chocolate base and make the finished slab look bright, festive, and ready for a spring celebration.
If desired, sprinkles, nuts, or coconut can be added at the same stage. These optional toppings allow the candy to be customized while still keeping the preparation process simple.
Because the top is decorated before chilling, the finished candy comes out of the refrigerator looking complete and ready to slice. There is no extra finishing work needed afterward.
Chilling and Setting the Texture
Once decorated, the pan is placed in the refrigerator for 1 to 2 hours. During this time, the candy firms up and develops the dense texture that allows it to be cut cleanly.
The chilling stage is essential because it gives structure to the rich chocolate and peanut butter mixture. Without enough time in the refrigerator, the candy may still be too soft to hold its shape well.
When fully set, the slab becomes easy to lift from the pan using the parchment paper. It can then be sliced into small squares or rectangles for serving.
The finished pieces are compact, smooth, and sturdy enough to handle comfortably at room temperature. That makes them especially suitable for dessert tables, party trays, and holiday snacking.
A Rich Candy With Broad Seasonal Appeal
One reason this recipe stands out is its balance of convenience and presentation. It is easy to prepare, but it still produces a finished candy that looks polished enough for special occasions.
The combination of white chocolate, milk chocolate, and peanut butter creates a sweet, creamy flavor profile that feels familiar and crowd-friendly. The condensed milk enhances that richness, while the vanilla adds a subtle finishing note.
Its pastel top layer gives it a cheerful holiday character without requiring complicated decoration. The result is a dessert that feels festive while remaining accessible to make in a home kitchen.
Because it is sliced after chilling, the portion size can also be adjusted easily. Smaller pieces work well for candy platters, while larger squares make the treat feel closer to a fudge bar.
An Easy Addition to Easter Entertaining
Holiday cooking often involves multiple dishes competing for oven space and attention. This candy avoids that problem by relying on the slow cooker and refrigerator instead of baking time.
That makes it especially useful during Easter, when the kitchen may already be busy with main dishes, side items, and other desserts. A recipe that can be assembled with minimal hands-on effort offers practical value as well as flavor.
Its make-ahead nature also adds to its usefulness. Once chilled and cut, the candy is ready to serve without any last-minute preparation.
For gatherings, this helps reduce stress and keeps dessert service simple. The candy can be placed on a tray, added to a holiday spread, or portioned into containers ahead of time.
A Simple Recipe With a Polished Result
Slow Cooker Easter Candy combines accessible ingredients with an uncomplicated method to produce a holiday treat that feels both comforting and festive. From the chocolate and peanut butter base to the pastel topping, every part of the recipe supports a dessert that is rich, tidy, and easy to enjoy.
The method relies on steady low heat, periodic stirring, and a final chill in the refrigerator. Those steps are simple enough for a relaxed cooking session, yet effective enough to create a candy with a smooth texture and clean shape.
For anyone seeking an Easter dessert that requires little active effort but still looks celebration-ready, this recipe delivers exactly that. It turns a few pantry and baking staples into a firm, velvety candy that fits naturally into the season.
With its colorful finish, dependable texture, and straightforward preparation, it stands as a practical and festive option for spring entertaining. Once sliced and served, it brings the look of a holiday candy shop to the table through a method designed to stay easy from start to finish.