
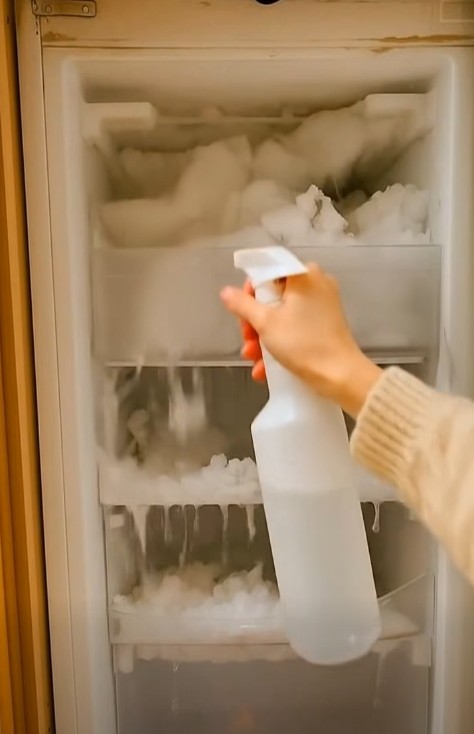
How to Defrost a Freezer Faster: The Simple Warm-Water Trick That Helps Loosen Stubborn Ice
Tired of Thick Ice Taking Over Your Freezer? This Easy Household Method Can Make Defrosting Less Frustrating Without Sharp Tools or Risky Heating Devices
Defrosting a freezer is one of those household chores that almost everyone would rather postpone.
It often begins with a small layer of frost that seems harmless. But as the weeks pass, that thin coating can turn into thick, stubborn ice covering the freezer walls, shelves, and drawers.
Eventually, frozen food becomes difficult to organize, drawers stop sliding smoothly, and valuable storage space disappears beneath the buildup.
Then comes the frustrating part: emptying the freezer, finding somewhere safe to store the food, placing towels on the floor, and waiting for the ice to melt.
Fortunately, there is a simple technique that may make the process easier.
Instead of scraping away stubborn frost, you can use a bowl of warm water to help loosen the ice naturally, provided your freezer’s manufacturer permits this method.
The trick requires very little equipment and may reduce the amount of time spent waiting for thick frost to soften.
However, there are several important safety precautions to follow before trying it.
Why Does So Much Ice Build Up Inside a Freezer?
Freezers are designed to maintain very low temperatures, but every time the door opens, warmer air from the surrounding room enters the compartment.
That air contains moisture.
When the moisture encounters cold interior surfaces, it can freeze and gradually form frost.
Over time, repeated exposure to warm and humid air can cause ice to accumulate around the freezer walls, shelves, and stored food.
Several everyday habits can make the problem worse.
- Leaving the freezer door open for too long.
- Frequently opening and closing the door.
- Placing warm food inside the freezer.
- Overloading the compartment or blocking airflow.
- Using a freezer with a damaged or poorly fitting door seal.
- Failing to defrost a manual-defrost freezer when necessary.
Some frost accumulation is normal in manually defrosted appliances.
But when thick ice begins restricting storage space or preventing drawers from opening properly, it may be time to address the buildup.
The Simple Warm-Water Trick for Defrosting a Freezer
One practical way to help loosen frost is to place a heat-safe bowl of warm water inside a switched-off, unplugged freezer.
The warmth gradually raises the temperature of the surrounding air, helping the ice soften and separate from the interior surfaces.
This can make it easier to remove loose pieces without using sharp utensils or excessive force.
Importantly, the water should be warm rather than boiling.
Extremely hot water may damage certain freezer materials, particularly cold glass shelves or sensitive plastic components.
The method is also not suitable for every appliance, so checking the manufacturer’s instructions should always come first.
Step 1: Check Your Freezer’s Manual
Before starting, determine whether your freezer requires manual defrosting.
Many modern appliances have automatic defrost systems and should not require routine manual ice removal.
Other models are specifically designed to be defrosted periodically.
Your freezer’s manual may contain instructions about drainage, removable shelves, cleaning products, and whether warm-water containers can be used safely.
If the manufacturer recommends a different procedure, follow those instructions instead.
Step 2: Remove and Protect Your Frozen Food
Before switching off the appliance, remove the frozen food and place it somewhere that will keep it cold.
Another freezer is ideal when available.
An insulated cooler with suitable frozen ice packs can also help protect food during the cleaning process.
Keep frozen products together and minimize the amount of time they spend outside temperature-controlled storage.
For food safety, do not assume that everything can be refrozen simply because it still feels cool.
Food that still contains ice crystals or has remained at 40°F (4°C) or below can generally be refrozen or cooked, according to USDA guidance. Food that has been above safe temperatures for too long may need to be discarded.
If your freezer contains a large amount of food, consider scheduling the task when supplies are relatively low.
Step 3: Switch Off and Unplug the Freezer
Once the food has been removed, turn off the appliance and unplug it according to the manufacturer’s directions.
This is an essential safety precaution.
Melting ice creates water, and electrical equipment must be protected from moisture.
Keep the electrical plug, outlet, and surrounding area dry throughout the process.
Do not begin washing or defrosting the interior while the appliance remains connected to power unless the manufacturer explicitly provides a different safe procedure.
Step 4: Place Towels Around the Freezer
As the ice melts, water will begin collecting at the bottom of the compartment.
Without preparation, it can spill onto the kitchen floor.
Place absorbent towels around the base of the appliance and position additional towels where needed to collect melting water.
If your freezer has a designated drainage outlet or defrost tray, follow the manufacturer’s instructions for using it.
Check the towels periodically and replace them when they become saturated.
This small step can make cleanup much easier.
Step 5: Place a Bowl of Warm Water Inside
Now comes the central part of the method.
Fill a stable, heat-safe bowl with warm water.
Carefully position it inside the freezer on a suitable surface, ensuring that it cannot tip over.
Do not use boiling water.
Do not pour hot water directly onto frozen walls, glass shelves, or plastic components.
If the manufacturer permits, you may close the freezer door briefly to help retain warmth inside the compartment.
Check the water periodically.
When it cools, replace it with fresh warm water if necessary.
The ice may begin softening around its edges, making it easier to remove once it loosens naturally.
Step 6: Let the Ice Loosen Without Forcing It
Thick frost may take longer to soften than a thin layer.
The exact time depends on the freezer’s size, design, room temperature, and amount of accumulated ice.
Some sections may loosen relatively quickly, while others require more patience.
Avoid trying to speed up the process by striking or prying at firmly attached ice.
If a piece separates easily, it may be removed gently, provided the manufacturer permits it.
Otherwise, allow more time for the ice to melt.
Why You Should Never Use a Knife to Remove Freezer Ice
When frost becomes thick, it may be tempting to use a kitchen knife, screwdriver, or other sharp object to break it apart.
But this shortcut can cause expensive damage.
Freezer walls may conceal refrigerant tubing or other important components.
Puncturing or damaging those parts can cause refrigerant leakage, appliance failure, or additional safety hazards.
Sharp tools also create a risk of personal injury, especially when applied to slippery ice.
Never use knives, chisels, screwdrivers, or similar utensils to force ice away from the freezer’s interior.
Why Hair Dryers and Heat Guns Are Also Risky
Another common household suggestion is to use a hair dryer to melt freezer ice.
Although the idea may sound convenient, combining electrical heating devices with melting water introduces potential hazards.
There is also a risk of damaging plastic surfaces, seals, or other components through concentrated heat.
Heat guns, open flames, and improvised heating devices can create even greater dangers.
Unless your appliance manufacturer explicitly authorizes a particular technique, these methods should be avoided.
Using controlled warmth from an approved method and allowing the ice to loosen naturally is generally a safer approach.
Step 7: Clean and Dry the Freezer Interior
Once the ice has melted or loosened sufficiently, remove the remaining water.
Use a soft cloth or sponge to wipe the walls, shelves, corners, and bottom of the compartment.
Pay attention to areas where moisture may collect.
If cleaning is necessary, use products recommended by the appliance manufacturer.
Avoid abrasive cleaners and harsh chemicals that could damage interior materials.
Before restarting the freezer, make sure the interior is clean and dry.
Leaving standing water behind may contribute to new ice formation once the appliance cools again.
Step 8: Restart the Freezer and Wait Before Restocking
After cleaning, reconnect the freezer and restart it according to the manufacturer’s instructions.
Allow the compartment to return to the appropriate food-storage temperature before replacing frozen items.
For ordinary household freezers, the recommended storage temperature is 0°F (-18°C).
The time required to reach that temperature varies by appliance and surrounding conditions.
Once the freezer is sufficiently cold, return the food promptly, provided it has remained safe for storage.
Arrange items so that drawers move freely, vents remain unobstructed, and the door closes securely.
How Long Does the Warm-Water Method Take?
There is no universal defrosting time.
A freezer with a relatively thin layer of frost may require much less time than one with thick, compacted ice.
Other factors include the size of the appliance, room temperature, and how frequently the warm water is replaced.
The method can help soften ice, but it should not be promoted as a guaranteed five-minute solution.
Some freezers may still require considerable time to defrost completely.
The main benefit is making stubborn frost easier to manage without resorting to damaging tools.
How Often Should You Defrost Your Freezer?
The appropriate schedule depends on the appliance.
Manual-defrost freezers may require periodic maintenance as frost accumulates.
Some manufacturers recommend defrosting when the ice reaches a specified thickness.
Automatic-defrost appliances normally manage frost through their built-in systems.
If a frost-free freezer develops heavy ice buildup, that may indicate a problem requiring inspection rather than routine manual defrosting.
Always follow the maintenance recommendations for your particular model.
How to Prevent Ice From Building Up Again
Once your freezer is clean, a few practical habits can help reduce future frost accumulation.
Keep the Door Closed Whenever Possible
Every time the freezer door opens, warm, humid air enters.
Organizing food so that items are easy to find can reduce the time spent searching with the door open.
Inspect the Door Seal
A damaged or dirty gasket may allow moisture to enter even when the door appears closed.
Check for visible cracks, tears, gaps, or dirt.
Clean or replace the seal according to the manufacturer’s recommendations.
Avoid Placing Steaming-Hot Food Inside
Very hot food introduces additional heat and moisture into the compartment.
Cool food safely according to food-storage guidance before freezing it, without leaving perishable items at room temperature for extended periods.
Do Not Block Internal Vents
Some freezers require unobstructed airflow to maintain consistent temperatures.
Follow the manufacturer’s loading instructions and avoid overpacking areas around vents.
Investigate Repeated Heavy Frost
If thick ice returns unusually quickly, the problem may involve a damaged gasket, an improperly closing door, or a malfunctioning component.
In such cases, repeated defrosting may not solve the underlying issue.
A qualified appliance technician can help identify the cause.
Does Thick Ice Make a Freezer Less Efficient?
Heavy frost can reduce usable storage space and make drawers or shelves harder to operate.
Depending on the freezer’s design, significant ice buildup may also interfere with normal operation.
However, the effect on energy consumption varies by appliance and the location of the frost.
It would be misleading to claim that every thin layer of ice automatically causes a dramatic increase in electricity costs.
The most reliable approach is to maintain the appliance according to the manufacturer’s instructions and address unusually heavy buildup.
Is the Warm-Water Trick Safe for Every Freezer?
No.
Different freezers have different interior materials, drainage arrangements, shelves, and defrosting systems.
Some models may not be suitable for placing warm-water containers inside.
Others may require specific procedures to protect their components.
Before attempting this technique, check the manufacturer’s manual.
If the manual prohibits the method or recommends another approach, follow the manufacturer’s guidance.
The purpose of the warm-water trick is to make defrosting easier, not to risk damaging an expensive appliance.
Common Freezer Defrosting Mistakes to Avoid
Even a simple cleaning task can go wrong when important precautions are overlooked.
- Beginning the process without protecting frozen food.
- Forgetting to unplug the appliance when required.
- Using boiling water or pouring hot water directly onto cold surfaces.
- Scraping ice with sharp utensils.
- Using hair dryers, heat guns, or open flames.
- Allowing melting water to reach electrical outlets.
- Restarting the freezer while standing water remains inside.
- Returning food before the appliance reaches a safe storage temperature.
- Ignoring repeated heavy frost that may indicate a mechanical problem.
A little patience and preparation can help prevent these problems.
Final Thoughts: A Simple Trick That Can Make Freezer Defrosting Easier
Defrosting a freezer may never become anyone’s favorite household chore, but it does not have to be unnecessarily difficult.
For compatible manually defrosted appliances, a bowl of warm water can help soften stubborn frost and make ice removal more manageable.
The method is simple, inexpensive, and requires only basic household supplies.
However, safety matters more than speed.
Always check the manufacturer’s instructions, protect frozen food, disconnect the appliance as directed, and avoid sharp tools or improvised heating devices.
After defrosting, keeping the door seal in good condition, minimizing unnecessary door openings, and maintaining proper airflow can help reduce future ice accumulation.
The next time thick frost begins taking over your freezer, this straightforward approach may help turn a frustrating afternoon of scraping and waiting into a more manageable cleaning task.
Sometimes, the most useful household tricks are the simplest ones—as long as they are used carefully and correctly.