
How to Make a Simple Homemade Toilet Cleaner Using Common Household Ingredients
A Budget-Friendly Cleaning Alternative
Many households rely on store-bought toilet cleaners to maintain cleanliness and freshness in the bathroom. While these products can be effective, they are often relatively expensive and may contain strong chemical ingredients.
For those who prefer a simpler approach, homemade cleaning solutions made from common household items can offer a practical alternative. With a few basic ingredients, it is possible to create a toilet cleaner that helps maintain freshness and cleanliness.
This method uses ingredients that are often already available in the kitchen or cleaning cabinet, making it a convenient option for many homes.
Why Homemade Cleaning Solutions Are Popular
Homemade cleaning methods have gained popularity because they allow people to control the ingredients used in their homes. Many individuals appreciate using simple materials that they recognize and trust.
Another advantage is cost savings. Household ingredients such as soap, baking soda, and salt are inexpensive and easy to find.
By combining these ingredients, it is possible to create cleaning mixtures that can help remove grime and maintain a fresh bathroom environment.
These solutions can also be customized with fragrances using essential oils if desired.

Ingredients Needed for the Cleaner
This homemade cleaner requires only a few ingredients that most households already have available.
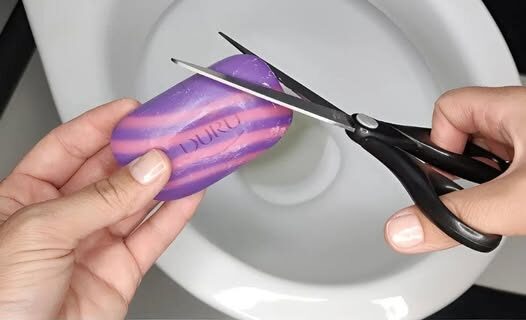
Half a bar of soap or leftover soap scraps can be used as the main base for the mixture. Soap helps break down dirt and residue while providing a mild cleaning action.
Baking soda is commonly used in cleaning because of its gentle abrasive properties. It can help remove stains and neutralize odors.
Coarse salt contributes additional scrubbing ability, helping the mixture work more effectively against buildup.
Essential oil can be added for fragrance, although this step is optional depending on personal preference.
Preparing the Soap Base
The first step in creating the mixture is preparing the soap. A coarse grater can be used to grate half a bar of soap into small flakes.
If there are leftover pieces of soap that are too small to use normally, they can also be grated and added to the mixture. This makes the method useful for repurposing soap remnants that might otherwise be discarded.
Grating the soap helps it blend easily with the other ingredients.
Once grated, the soap flakes can be placed in a mixing bowl.

Adding the Dry Ingredients
After preparing the soap flakes, the next step is to mix in the dry ingredients.
Add one tablespoon of baking soda to the grated soap. Baking soda helps support the cleaning process by loosening stains and absorbing unwanted odors.
Next, add one tablespoon of coarse salt. The salt helps create a slightly textured mixture that can assist in removing grime.
These ingredients work together to create a cleaning base that can help maintain a cleaner toilet bowl.
Adding Fragrance With Essential Oils
To give the mixture a pleasant scent, essential oils may be added. This step is optional but can help create a fresh fragrance in the bathroom.
Common choices include lemon, lavender, or eucalyptus oil. These scents are often used in cleaning routines because they leave a refreshing aroma.
Approximately ten to fifteen drops of essential oil can be added to the mixture.
Stir the ingredients gently to distribute the fragrance evenly.

Creating the Right Texture
Once the dry ingredients are combined, small amounts of water can be added to bring the mixture together.
Water should be added gradually while stirring to avoid making the mixture too thin.
The goal is to create a thick, moldable consistency that can hold its shape.
If the mixture becomes too soft or runny, additional baking soda can be added to restore firmness.
Shaping the Cleaning Mixture
After achieving the proper consistency, the mixture can be shaped into small balls.
Each ball should be approximately the size of a walnut. This size makes them easy to handle and use later.
The shaped balls can be placed on a sheet of parchment paper to dry.
Spacing them apart slightly will allow air to circulate and help them firm up properly.

Allowing the Balls to Dry
The cleaning balls need time to harden before they are ready for use.
Leaving them on parchment paper for twenty-four to forty-eight hours usually allows them to dry completely.
During this time, the moisture evaporates and the mixture becomes solid.
Once dried, the balls should feel firm and hold their shape when handled.
Using the Cleaning Balls in the Toilet
There are several ways these homemade cleaning balls can be used.
One simple method is to drop a ball into the toilet bowl in the evening. Allowing it to sit overnight can help loosen residue and leave a mild fragrance.
In the morning, flushing the toilet removes the dissolved mixture and rinses the bowl.
This method can help maintain a clean appearance with minimal effort.

A Method for Continuous Freshness
Another option involves placing the cleaning balls in a small pouch or holder that can hang inside the toilet tank or near the rim of the bowl.
When placed in this location, the cleaning mixture gradually dissolves over time.
Each flush releases a small amount of the cleaning solution into the bowl.
This approach allows the toilet to receive a light cleaning effect with regular use.
Adding Extra Cleaning Power
Some people choose to add additional ingredients for tackling specific types of buildup.
For example, citric acid is sometimes included in homemade cleaning mixtures to help address mineral deposits caused by hard water.
Citric acid is known for its ability to break down limescale and mineral residue.
Adding a small amount to the mixture can enhance its effectiveness in areas where mineral buildup is common.
Using Molds for Different Shapes
Instead of shaping the mixture by hand, silicone molds can also be used.
Molds allow the mixture to take on different shapes and sizes while drying.
This can make the finished cleaning tablets easier to store and handle.
Some people enjoy using molds because they give the cleaning balls a neat and consistent appearance.
Storing the Finished Cleaning Balls
Once the cleaning balls are completely dry, proper storage helps maintain their effectiveness.
An airtight container is ideal for keeping them protected from moisture in the air.
Storing them in a dry location ensures they remain firm until needed.
When stored properly, the cleaning balls can remain usable for an extended period of time.
A Practical Cleaning Routine
Homemade cleaning solutions can become part of a regular household cleaning routine.
Using simple ingredients allows individuals to maintain cleanliness without relying solely on commercial products.
Combining these homemade methods with regular bathroom cleaning practices helps keep toilets fresh and well maintained.
Consistency in cleaning routines is often the most effective way to maintain hygiene and prevent buildup.
A Simple and Affordable Cleaning Method
Creating homemade toilet cleaner balls using soap, baking soda, and salt offers a practical option for maintaining bathroom cleanliness.
The process is straightforward and uses ingredients that are easy to find in many households.
With proper preparation and storage, these cleaning balls can provide a convenient addition to everyday cleaning routines.
This simple method demonstrates how common household items can be used to create effective solutions for maintaining a clean and fresh home environment.