
A Simple Freezing Method That Keeps Bread Fresh and Freezer-Burn Free
Managing a Household That Runs on Bread
In many busy households, bread is not just a pantry item but a daily necessity. From sandwich buns packed into lunchboxes to sliced bread stacked high for breakfast toast, the demand can feel never-ending.
For families with growing children, especially active boys with healthy appetites, bread often disappears faster than expected. English muffins for quick breakfasts and bagels for snacks only add to the steady rotation of baked goods moving in and out of the kitchen.
When bread goes on sale, stocking up feels like a smart and practical decision. Buying in bulk saves money and ensures there is always something on hand for an easy meal.
However, storing that extra bread properly can become a frustrating challenge. Pulling a loaf from the freezer only to find it dried out and covered in icy patches can make even the best bargain feel disappointing.
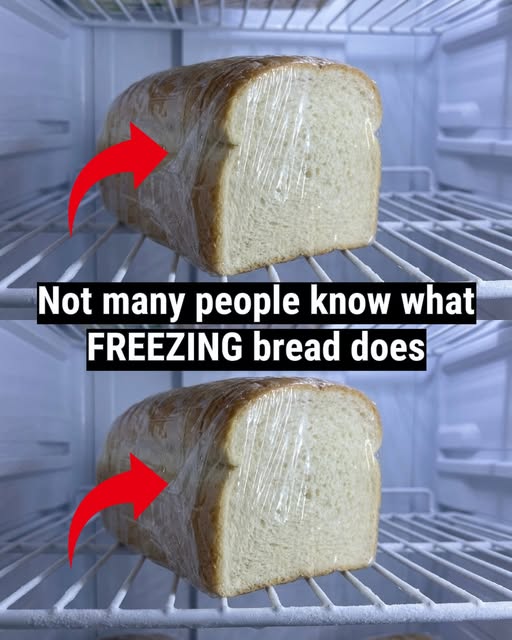
The Common Problem With Frozen Bread
Freezing bread seems simple enough. Many people place an entire loaf straight into the freezer, assuming it will remain as fresh as the day it was purchased.
Unfortunately, that approach often leads to freezer burn. When moisture escapes from the bread and forms ice crystals, the texture changes dramatically.
Once thawed, the loaf can feel stiff, dry, and unpleasant to eat. Instead of soft slices perfect for sandwiches, the bread may crumble or taste stale.
This problem becomes especially frustrating when you rely on frozen bread as a backup for busy days. No one wants to waste food or money because of improper storage.
Timing Matters: Slice While It’s Fresh
The key to preventing freezer burn starts the moment you bring the bread home. If you purchase a full, unsliced loaf with plans to freeze it, preparation should happen right away.
Slice the loaf while it is still at peak freshness. Fresh bread holds its structure better during freezing and maintains better texture once thawed.
Waiting until the loaf begins to go stale before slicing and freezing can lead to disappointing results. Bread that has already lost moisture will not improve in the freezer.
Handling the loaf while it is soft and newly baked ensures each slice freezes in the best possible condition.
Preparing the Bread for Individual Freezing
After slicing the loaf, the next step involves arranging the pieces properly. This stage prevents the slices from sticking together in a solid block.
Begin by placing a sheet of parchment paper on top of a baking sheet. The parchment acts as a protective layer and makes removal easy once the bread is frozen.
Lay the slices flat in a single layer across the baking sheet. Avoid stacking them or overlapping the edges.
Spacing them out ensures that each slice freezes individually. This small detail makes a big difference later.
Flash Freezing for Best Results
Once the slices are arranged on the parchment-lined baking sheet, place the entire sheet into the freezer. Do not cover the bread during this step.
This method is often referred to as flash freezing. By freezing each slice separately and uncovered, the bread firms up quickly without clumping together.
The cold air circulates around every slice, helping them freeze evenly. This prevents moisture buildup that can later cause icy patches or texture changes.
Allow the slices to remain in the freezer until they are completely solid. The freezing time may vary depending on thickness, but the goal is full firmness before moving on to the next step.
Proper Storage After Freezing
Once the bread slices are fully frozen, remove the baking sheet from the freezer. At this stage, the slices will no longer stick to each other.
Transfer the frozen slices into a resealable freezer bag. Work carefully but quickly to prevent unnecessary thawing during the transfer.
Before sealing the bag, press out as much air as possible. Removing excess air reduces the chance of freezer burn and keeps the bread tasting fresh.
After sealing, place the bag back into the freezer. The slices can now be stored compactly without taking up the space of a full baking sheet.
Why Removing Air Is So Important
Freezer burn occurs largely due to exposure to air. When air remains trapped inside the storage bag, it pulls moisture from the surface of the bread.
This moisture loss creates dry spots and ice crystals that affect both taste and texture. By squeezing out the air before sealing, you significantly lower the risk of this happening.
Using a sturdy, resealable freezer bag also helps protect the bread from absorbing odors from other frozen foods.
A tightly sealed environment keeps the bread closer to its original quality.
Thawing Bread the Right Way
When it is time to use the frozen bread, proper thawing ensures the best texture. The simplest method is allowing the slices to sit at room temperature.
Because the slices were frozen individually, you can remove only what you need. There is no need to thaw an entire loaf at once.
Within a short period, the bread will soften naturally. The texture remains close to fresh, especially if it was frozen at peak quality.
For those in a hurry, the toaster provides an efficient alternative.
Using the Toaster’s “Defrost” Setting
Many modern toasters include a “defrost” setting specifically designed for frozen bread. This function gently warms the slice while restoring its softness.
Placing a frozen slice directly into the toaster eliminates waiting time. The bread emerges warm and ready to eat.
This approach works especially well for toast, English muffins, and bagels.
Because the slices were frozen separately, they toast evenly without sticking together or tearing apart.
Making the Most of Bread Sales
With this freezing method, taking advantage of bread sales becomes far more practical. Buying multiple loaves no longer means risking wasted food.
Instead of worrying about loaves going stale on the counter, you can freeze them confidently.
This approach supports both budgeting and meal planning. Having bread ready in the freezer simplifies daily routines.
Busy mornings and quick dinners become easier when high-quality bread is always available.
Reducing Waste in the Kitchen
Food waste can add up quickly, especially in households that consume large quantities of bread. Improper storage often leads to throwing away dried or freezer-burned loaves.
By taking a few extra minutes to slice and flash freeze properly, you extend the life of each loaf significantly.
This not only saves money but also reduces unnecessary waste.
Preserving food effectively is both practical and responsible.
A Simple Habit With Big Benefits
The process may sound detailed, but it quickly becomes routine. Slice the loaf while fresh, freeze the slices flat on parchment paper, transfer them to a sealed bag, and remove excess air.
These steps require minimal effort but deliver consistent results.
Instead of dealing with tough, icy bread, you enjoy soft slices whenever needed.
With this method in place, the freezer becomes a reliable extension of your pantry rather than a source of frustration.
Fresh Bread, Whenever You Need It
For households that move through bread quickly, proper freezing techniques make all the difference. Whether it is sandwich buns for school lunches or sliced bread for weekend breakfasts, quality matters.
Taking control of how bread is frozen ensures it tastes just as good later as it did on the day it was purchased.
With careful preparation and storage, you can say goodbye to freezer-burned disappointment.
Instead, you can look forward to consistently fresh bread ready whenever your household needs it.