
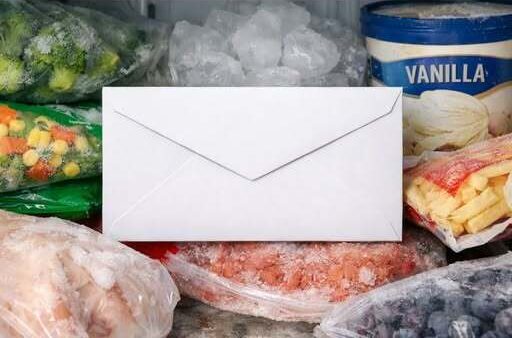
How the Freezer Trick May Help Open a Sealed Envelope Without Destroying It
A Simple Mistake That Can Feel Impossible to Reverse
Sealing an envelope can feel like the final step in a small but important task. A check, personal letter, document, or private message is placed inside, the flap is pressed down, and the contents appear to be permanently locked away.
Sometimes, however, regret arrives almost immediately. A signature may have been forgotten, the wrong paper may have been inserted, an amount may need correction, or the sender may simply want to reconsider what was written.
At that point, the sealed envelope can feel surprisingly restrictive. The paper is still intact, the contents are only inches away, and yet opening the flap normally may tear the envelope or leave obvious signs that it was disturbed.
An old household method offers a possible way to reverse the sealing process. It involves placing the envelope inside a plastic bag and leaving it in a freezer long enough for certain types of glue to become firm and brittle.
The technique does not work in every situation, but it may provide a careful second chance when used on the right kind of envelope.
Why Cold Temperatures Can Affect Envelope Glue
Traditional envelopes often use a water-activated adhesive along the inside edge of the flap. This is the familiar type of envelope that must be moistened before it can be sealed.
The adhesive is designed to soften when exposed to moisture. Once the flap is pressed against the envelope, the glue dries and forms a bond between the two paper surfaces.
Cold temperatures can sometimes change the condition of that dried adhesive. Instead of remaining flexible and strongly attached, the glue may stiffen enough to lose part of its grip.
This does not cause the flap to open automatically. The freezer simply creates conditions that may make the adhesive easier to separate from the paper beneath it.
The result depends heavily on the envelope, the glue, the amount of moisture originally used, and how firmly the flap was pressed when it was sealed.
When the method succeeds, the bond becomes weak enough for the flap to be lifted gradually without seriously damaging the surrounding paper.
Preparing the Envelope for the Freezer
The envelope should first be placed inside a clean plastic bag. The bag helps protect the paper from moisture, food residue, frost, and other material that may be present inside the freezer.
This protective step is especially important because paper can absorb moisture. Even a small amount of condensation may soften the envelope, wrinkle it, blur certain inks, or make the flap more likely to tear.
The plastic bag should be closed before it is placed in the freezer. The envelope should remain flat so the paper does not develop unnecessary bends or creases.
No additional water should be added. The purpose of the method is to cool and harden the existing adhesive, not to wet the flap again.
Patience is a key part of the process. Removing the envelope too quickly may not give the glue enough time to become brittle.
Once the envelope has been thoroughly chilled, it can be taken out of the plastic bag and examined immediately. Waiting too long may allow the adhesive to warm and regain some of its original flexibility.
Opening the Flap Requires a Gentle Approach
The flap should never be pulled upward suddenly. Even when the glue has weakened, the paper may still be attached in several places.
A fingertip can be used to test one corner of the flap. If the edge begins to separate easily, the opening can continue slowly across the envelope.
A smooth, dull object such as a butter knife may also help. It should be guided beneath the flap carefully, without forcing it into the paper.
The movement should be gradual and controlled. Lifting the flap millimeter by millimeter gives the adhesive time to release and reduces the chance of tearing the envelope.
If one area remains firmly attached, it is better to stop than to pull harder. Excessive pressure can remove the top layer of paper, create a jagged edge, or split the flap completely.
The envelope may be returned to the freezer for additional cooling if the glue appears to be softening too quickly. However, repeated attempts still cannot guarantee a clean result.
The Method Works Best on Traditional Envelopes
The freezer technique is most suitable for older-style envelopes with water-based, lick-and-stick adhesive. These glues are more likely to harden when exposed to cold temperatures.
Because the bond may become brittle, the flap can sometimes be separated while leaving both paper surfaces largely intact.
Modern self-sealing envelopes are different. Many use peel-and-stick adhesive that remains tacky and flexible even after spending time in a freezer.
These newer adhesives are designed to create a strong bond without being moistened. Cold temperatures may have little effect on them, making the freezer method unreliable.
An envelope with a heavily glued flap can also be difficult to open. If too much moisture was used during sealing, the adhesive may have soaked deeper into the paper fibers.
Firm pressure can strengthen the bond as well. A flap that was pressed down forcefully across its entire surface may remain attached even after the envelope has been chilled.
Why Results Can Vary From One Envelope to Another
Two envelopes that look identical may respond differently to the same method. Small differences in glue, paper thickness, moisture, pressure, and storage conditions can affect the result.
An envelope sealed only moments earlier may behave differently from one that has remained closed for several days. The adhesive may continue drying and strengthening after the flap is first pressed down.
Paper quality also matters. A strong, thick envelope may tolerate gentle lifting, while thin paper may split before the glue releases.
The contents inside the envelope should also be considered. Freezing may be unsuitable when the envelope contains materials that could be affected by cold or moisture.
Even inside a plastic bag, condensation can become a concern when the envelope returns to room temperature. The paper should therefore be handled carefully after removal from the freezer.
The method is best understood as a possibility rather than a guaranteed solution. It may loosen the seal, but it cannot restore every envelope to its original condition.
What to Do After the Envelope Is Opened
If the flap opens successfully, the contents can be removed, corrected, replaced, or reviewed. The envelope should then be allowed to return to room temperature before any attempt is made to close it again.
The original adhesive may no longer hold evenly after it has been separated. Some areas may remain sticky, while others may have lost most of their bonding strength.
A small amount of appropriate adhesive may be needed to reseal the flap. It should be applied sparingly to avoid wrinkling the paper or creating visible marks.
The envelope should then be pressed flat until the new seal is secure. Placing it beneath a light, flat object may help keep the flap smooth while the adhesive dries.
However, reusing the envelope is not always the best choice. If the flap is damaged, the edge is rough, or the paper has become noticeably creased, replacing it may produce a cleaner result.
A fresh envelope and a new stamp may be preferable when appearance, security, or professionalism is important.
Knowing When to Stop Can Prevent More Damage
The greatest risk comes from trying to force a result after the method has clearly failed. Once the flap begins to tear, continued pulling usually makes the damage more visible.
A small separation may still be manageable, but a long rip can weaken the entire back of the envelope. The contents may also be damaged if a tool is pushed too deeply beneath the flap.
Stopping early preserves the option of cutting the envelope open carefully and transferring everything into a replacement.
This may not provide the nearly invisible correction originally hoped for, but it prevents a minor sealing mistake from becoming a larger problem.
The freezer technique rewards slow movement rather than strength. Its success depends on allowing the cold to affect the glue and then responding gently to the condition of the paper.
A Household Trick With Clear Limitations
The appeal of the freezer method comes from its simplicity. It requires no steam, complicated equipment, or aggressive cutting.
It also avoids exposing the envelope directly to heat or water, both of which can weaken paper and affect the contents inside.
Still, the freezer is not a magic eraser. It cannot reverse every seal, and it cannot guarantee that the envelope will look untouched afterward.
Traditional water-based glue may loosen enough to allow a careful opening. Modern peel-and-stick adhesive may remain firmly attached, while heavily moistened flaps may tear regardless of how long they are chilled.
The technique is therefore most useful as a cautious first attempt. When it works, it can provide access to a letter, check, or document without destroying the envelope.
When it does not work, the safest solution is often the simplest one: remove the contents carefully, use a fresh envelope, apply a new stamp, and check everything before sealing it again.
A sealed envelope may feel final, but some mistakes can still be corrected. The freezer trick offers a small opportunity to reopen what was closed, provided the glue responds and the paper is treated with patience.